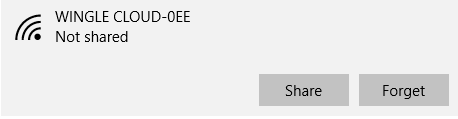
Articles by "Tips&Tricks"
Showing posts with label Tips&Tricks. Show all posts
Print Friendly and PDF
Place where all sort of programming stuff and reviews,technology news are shared and Useful Project of C++,C,java C# etc
Turn your Windows 10 PC into a mobile hotspot by sharing your Internet connection with other devices over Wi-Fi. You can share a Wi-Fi, Ethernet, or cellular data connection. If your PC has a cellular data connection and you share it, it will use data from your data plan.

  • Press the windows key +I
  • Select the menu Network & Internet
  • then select Mobile Hotspot from Menu 
  • For Share my Internet connection from, choose the Internet connection you want to share.
  • Select Edit > enter a new network name and password > Save.

Like this 
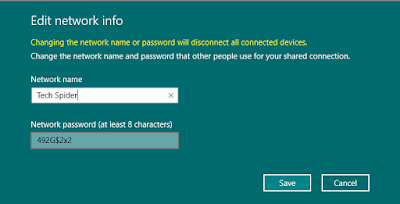
Use your PC as a mobile hotspot in windows 10

Turn on Share my Internet connection with other devices.
To connect on the other device, go to the Wi-Fi settings on that device, find your network name, select it, enter the password, and then connect.

Wi-Fi settings


Place where all sort of programming stuff and reviews,technology news are shared and Useful Project of C++,C,java C# etc
Today I will discuss how we access the internet in our laptop through wired or 3G or 4G data card. Here is most important thing in this articles mhotspot that turns your laptop into Wifi hotspot .with this software no need of the router or external hardware is required apart from your existing one. Mhotspot is free software which converts your windows 7, 8, 8.1 & 10 Laptop into a virtual Wifi router and creates a secure Wi-Fi hotspot connection. You can share an internet connection (Ethernet, Data-card, 3G/4G, LAN, Wi-Fi) on multiple devices like Android Phone, Laptop, iPhone, and iPad etc.


How do we access internet in our Laptop through wifi hotspot?


The question is how to connect Wi-Fi hotspot on Laptop. First of all, download mhotspot from an official website. After downloading and installation it on your Laptop and lunch the mhotspot and follow the simple steps for Wi-Fi hotspot.


mhotspot

How to setup mhotspot:


  • Put your hotspot name and password (Must be 8 digits
  • After it set internet source 
  • Then set max clients (up to 10 devices)
  • And start your hotspot 
You can also customize notification, startup etc. clicks setting 

mhotspotSetting

Best Features of mhotspot:

  • Compatible with android devices,Linux(coming soon) and  Windows 7,8,8.1 and 10 
  • You can set your own hotspot name and password without any restrictions 
  • Show password 
  • Connect up to 10 devices to the hotspot 
  • Share any type of Internet Connection(LAN, Ethernet,3G/4G,Wifi etc) 
  • Android phones, IPads, PDAs, tablet-pcs and other devices can access 
  • See the details of the connected device(Name, Ip & Mac Address) 
  • See the network usage(Upload and Download Speed, Transfer Rates) 
  • Secures your wireless hotspot with WPA2 PSK password security 
  • Set max. number of devices that can be connected (up to 10 devices) 
  • Extends your Wifi range(Acts as a repeater)
  • Give number of connected client(MB) 
  • Total data transmitted speed (Kbps)
  • Total upload speed(Kbps) 
  • Downloading speed(Kbps)

Source:mhotspot
Place where all sort of programming stuff and reviews,technology news are shared and Useful Project of C++,C,java C# etc
Windows usually connected with different  networks such as wifi ,Ethernet, and broadband.whenever PC connect to a new wifi network .it's  added and store in the list of windows profile .The stored profile can be containing its name ,password and etc. with the time period list of the profile can increase.you may want to delete or remove the profiles.


In this blog , I will show you how can remove, delete or forget wifi password .

Simple step is follow 

How to forget wifi password in windows 10

  • Go to windows search bar
  • Type in search bar setting  and press enter 
  • Select Network & Internet
  • Select wifi from sidebar 
There is two option 
  • Advanced option 
  • Manage wifi setting
Select the manage wifi setting option and go down you will see the option manage known networks 

manage wifi setting

select the profile or network  either  you want to forget or remove networks .click on forget this delete the network detail and profile information 


Place where all sort of programming stuff and reviews,technology news are shared and Useful Project of C++,C,java C# etc
Today I will discuss about Facebook messenger app  new update change nick name emoji and chat color .
You can customize on your own need, you can customize chat color ,change the name of your friend in desktop chat messenger and also set a frequently used emoji that you like most that you can send it to your friend in just one click .Continue reading to find how to do all of these on your phone or desktop  


How To change Facebook nick name emoji and chat color from desktop ?

Before starting Make sure that you are on desktop messenger 
Launch the web browser on desktop and type https://www.messenger.com/ in search bar Whether you are using the Messenger app on an Android device or IOS steps should be the same.


How To change Facebook nick name


Select the chat that you want to customize. it can be either a one on one chat or group chat ,click on the friend name at the top of screen,it will be your friend's name ,for a friend chat,it will be the friend name .
Note :In Desktop

In the option screen, you will see four options: Nicknames, Color ,Emoji and mute notification. Pick  one of them that you want to customize.


you will see four options: Nicknames, Color ,Emoji

The Nicknames section lists all the participants in the current chat . To set a nickname for someone, simply click on the Set Nickname ,type the name in the popup , and click to Save. Remember that this change will be unique , so everyone else will see that nickname instead of the real Facebook name.


Nicknames section

Pick a color for this conversation inside chat is rather easy. You select the favorite color option, and then click on the desired color in the table. You have only 15 colors to choose from. This setting will be synced to your friend's devices as well.


Pick a color

The Emoji option gives you quick access to a frequently used emoji. All you have to do is pick your favorite one, and it will be displayed at the sidebar of chat . click on this button will send the emoji to your friends.
Emoji option

Place where all sort of programming stuff and reviews,technology news are shared and Useful Project of C++,C,java C# etc
In this Article I will Show you to how fix  SQL management studio Error 26 this is network instances error statement given below :
How to Fix SQL Management studio Error 26 ?

A network-related or instance-specific error occurred while establishing a connection to SQL Server. The server was not found or was not accessible. Verify that the instance name is correct and that SQL Server is configured to allow remote connections. (provider: SQL Network Interfaces, error: 26 - Error Locating Server/Instance Specified)

Simple Step are follow :
  • First go to start menu
  • Type The SQL sever configuration manager and press  enter 
How to Fix SQL Management studio Error 26 ?

  • In sidebar menu see SQL Server Services  select this menu 
  • and  then select SQL server (SQLEXPRESS)
  • Right Click  and the select Start 
I hope You will enjoy .Still You have and problem please comment below i will fix your problem.
Place where all sort of programming stuff and reviews,technology news are shared and Useful Project of C++,C,java C# etc
In this articles i will discuss about windows 10 app store not working and i will show you to how to fix this issue this is very common issue with windows app store .

Windows 10 Store not working and how fix it ?

To restore and reinstall Windows Store in Windows 10 after removing it with PowerShell, you need to do the following:

Press window key + R hit enter  Type Power shell and then press enter

Windows 10 Store not working and how fix it ?

and then type the following command in power shell or write in search bar run as administrator
Get-Appxpackage -Allusers
Windows 10 Store not working and how fix it ?

Then run this PowerShell command, still elevated, replacing the ****** with the PackageFileName from above:

Windows 10 Store not working and how fix it ?
Add-AppxPackage -register "C:\Program Files\WindowsApps\******\AppxManifest.xml" -DisableDevelopmentMode
Example 
Add-AppxPackage -register "C:\Program Files\WindowsApps\Microsoft.VCLibs.120.00.Universal_12.0.30501.0_x64__8wekyb3d8bbwe\AppxManifest.xml" -DisableDevelopmentMode
I hope you will enjoy this articles . If you like this  please share it .still you have problem with that then comment below i will try to fix your problem.
Place where all sort of programming stuff and reviews,technology news are shared and Useful Project of C++,C,java C# etc
In this tutorial you will learn how to recover your deleted Facebook messages.
How to Find Deleted Messages on Facebook ?


Step 1 -- Accessing Facebook

Go to the Facebook account you want to recover messages from.

Step 2 -- Accessing Facebook Account Settings


On the upper right corner of the page, click the Settings icon. It's the one on the end that looks like a little cog. A drop-down menu will open. Click on "Account Settings."

Step 3 -- Download a copy

Next, click on the link that says "Download a copy" of your Facebook data.

Step 4 -- Start My Archive

When the new page opens, click "Start My Archive."

Step 5 -- Start My Archive

Click "Start My Archive" again. Click "Confirm."

Step  6 -- Download My Archive

The archive contains all your profile information, wall posts, events, pictures and messages. So it can take up to 3 hours for the archive to be generated. Once your archive is ready you can download it.

Step 7 -- Open Downloaded Archive

When you're ready to download your Facebook archive, repeat steps 1 through 3. But instead of clicking "Start My Archive," enter the password and click "Download Archive."

When the download is completed, extract it and open the file named "Index" (HTML Document)

Step 8 -- Recover your deleted messages.


Then click on "Messages" and wait for the messages to load. If you want to search your messages by keyword, press Control F OR F3. And this is how you recover your deleted Facebook messages.
Source:Youtube
Place where all sort of programming stuff and reviews,technology news are shared and Useful Project of C++,C,java C# etc
The following tutorial will help you create a bootable USB flash drive for Windows 10 the easy way.
This tutorial is also applicable for those of you trying to make bootable flash drive for Windows 7 or even the Windows 8.

How to Make Windows 10 Bootable USB Flash Drive?


 Why do I need a bootable USB Flash Drive?

Most modern computers today don’t ship with an optical drive. If you want to install fresh copy of Windows from scratch, the easiest and most preferred way of doing that without an optical drive is to install it from a bootable USB flash drive.

The process to do this is quite easy to follow and anyone who has medium level of skill with handling computers will breeze through it.

Which software to use?

There are many free programs out there which can help you to create a bootable windows 10 USB Flash drive. For this guide I would be using Rufus , because it’s very small and faster than all the other programs to create a bootable Windows 8.1 USB Flash drive. Follow these instructions to create a bootable windows 8.1 USB flash drive.
Instructions to create a bootable Windows 8.1 USB Flash Drive


Instructions to create a bootable Windows 8.1 USB Flash Drive


Step 1: Download and run Rufus
Step 2: From the device drop down menu select your USB flash drive
Step 3: For partition scheme

      select “GPT partition scheme for UEFI computer “ if you have a UEFI enabled Bios , otherwise select “MBR partition scheme for BIOS and UEFI computer “


Source :Rufus 

Place where all sort of programming stuff and reviews,technology news are shared and Useful Project of C++,C,java C# etc
Here i am telling about how i hide or unhide the folder or file in usb derive  with help the of command prompt. 

Here is the few simple steps are following :

Step:0 First insert usb derive into your computer . 
Step:1 And go to start menu and type a Cmd or press Ctrl+R 


Step:2 Type the pen derive name like that F: given below in the picture 


Step:3 in this step open the usb derive rename the folder or file as :e.g my-music

Step:4  for hiding a single folder type the command and press enter
attrib folder-name +s +h 


cmd


Step:5  for unhide the single file or  folder just type the command and press enter
attrib folder-name -s -h 
cmd

Step:6  For hiding  all folder in usb derive type a command and press enter
attrib +s +h +a *.* /s /d 
cmd

Step:7  For unhide the folder or file type a command and press enter
attrib -s -h -a *.* /s /d
cmd


Note : file name must be written with extension of the file in cmd 
For any query please comment below


Place where all sort of programming stuff and reviews,technology news are shared and Useful Project of C++,C,java C# etc
Consistent with you, which is the maximum not unusual mistake every beginner makes while coding in Java programming language? Nicely, there are some basic coding errors that people make time and again. Recognise a way to spot them and enhance your coding talents

10 most commonplace errors every beginner Java Programmer Makes

Since its introduction in 1995, Java has been converting our lives and exceeding the expectations of humans. The sun Microsystems group that labored across the clock to broaden this programming language centered the virtual television enterprise. As the concept of Java become too advanced at that time, it appeared best for the net and other packages.

Over the time, object-orientated programming language Java has spread everywhere and created its very own unique region inside the global of programming. The language is straightforward to learn but troubles do exist in Java just like any other language. Here I’ll be covering the ten most common errors made with the aid of each Java programmer.
This listing is based totally on the studies work carried out via records scientists that blanketed 250,000 Java programming beginners from all over the world. The usage of 37 million compilations, they found out the maximum common mistakes a developer makes whilst coding in Java.

To experiment this massive data set, Amjad Altadmri and Neil Brown from the university of Kent, united kingdom positioned the mistakes in 18 possible classes. The applications have been scanned for adjustments over the time by using searching out the next compilation where the mistake turned into now not gift.


10 most not unusual mistakes each beginner Java Programmer Makes

particularly, it became determined that maximum commonplace Java mistakes had been truely a result of common misconceptions based on free proof. Right here are the pinnacle 10 errors made via newbie Java programmers:


  • Unbalanced parentheses, curly braces, brackets, and quotation marks, or the use of these distinctive symbols interchangeably, together with in: while (a == zero].
  • Invoking strategies with incorrect arguments or argument types, which includes in:list.Get("abc").
  • Manage flow can reach stop of non-void approach with out returning, such as in:
<em>
public int foo(int x)
if (x &lt; zero)
 return zero;
 x += 1;
</em>
  • perplexing the venture operator (=) with the evaluation operator (==), together with in: if (a = b).
  • Ignoring or discarding the return price of a method with non-void return type, such as in: myObject.ToString();.
  • Use of == in preference to .Equals to compare strings.
  • Seeking to invoke a non-static approach as though it turned into static, together with in:MyClass.ToString();.
  • Magnificence claims to enforce an interface, but does not put into effect all of the required methods, which includes in: magnificence Y implements ActionListener  .
  • Invoking the forms of parameters whilst invoking a method, including in:myObject.Foo(int x, String s);.
  • Wrong semicolon in if statements or for and even as loops, such as in: if (a==b); return 6;.
The researchers determined that the most common mistake as additionally the perfect to spot. Relatively, different insects had been difficult to observe and they went omitted for more than 1,000 seconds or have been never tracked in any respect.


Did you find this list of the 10 maximum commonplace mistakes made with the aid of each Java programmer helpful? Percentage your views within the remarks underneath. 
Source: Askaswiss
Place where all sort of programming stuff and reviews,technology news are shared and Useful Project of C++,C,java C# etc
Welcome screen (the login screen or Logon Screen) is the part of Windows for decades, developing together with each version of the operating system and, like so much else in Windows, you can personalize it. Usually used for this third-party tools.


In Windows 7, you can set your image as a background logon screen without the help of any third-party programs, but the process is tedious because it requires editing the registry. Thus, the use of third-party tools is the preferred embodiment. Fortunately, since Windows 7 was released a lot of programs that allow you to quickly and easily change the background of the login screen "Seven", so there is plenty to choose from.

By the way, some users who are used to lock the screen in the mobile operating system and Windows 8 / 8.1, often referred to as the logon screen screen lock. In fact, Windows 7 is not the lock screen, but it can be added with the help of some utilities. There is also a category of programs that allow you to modify and customize other elements on the login screen, not just the background.

Here, in no particular order, are listed the four best and free tools to modify the welcome screen in Windows 7.

Windows 7 Logon Background Changer

This is probably one of the most popular tools of this type. Windows 7 Logon Background Changer has a nice interface, and is compatible with all editions of Windows 7, from Starter to Ultimate. In addition, there is support for both architectures - x86 and x64

Like the other tools in this Collection, Windows 7 Logon Background Changer does not change the system files. To download the tool, click the link below.


Logon Screen Rotator

Logon Screen Rotator was my personal favorite when I used Window 7 as the primary OS. In addition to its primary function, this tool is able to alternate the background images. Those. each time you start your computer, you can see the new background image

The program is completely free and is compatible with 32-bit and 64-bit versions of the operating system.Logon Screen Rotator is also compatible with Windows 8, but does not support Windows 8.1.

Tweaks.com Logon Changer

As I recall, Tweaks.com Logon Changer was the first instrument created to change the default background on the login screen Windows 7. Logon Changer lets you see how the image will appear on the login screen before you install it as a background.

Logon Screen

This is another free tool with which you can change the default background image on the login screen of Windows 7 to their own. This tool also offers an option that adds the item "Set as logon background" in the context menu of the file, ie simply right click on the image and select the item in the context menu to set your favorite picture as the background on the Welcome screen. Another tool available opportunity to show your own message on the Welcome screen.


Place where all sort of programming stuff and reviews,technology news are shared and Useful Project of C++,C,java C# etc
While Windows itself copes with the search and identification of available wireless networks, the final selection of the access point remains the same for the user. Now imagine that you have a few of these networks. Which one to choose? 

WiFi Commander - wireless manager for Windows 10 and Windows 10 Mobile

It is clear that the fastest and most secure. But how to determine the best network? This difficult task will help to solve the application WiFi Commander, designed for monitoring wireless networks.When installed on a laptop, tablet or smartphone, WiFi Commander detects all available access points and provides full information about them. List of network data may include signal strength, the total operating time of the access point, the exact time of detection, encryption type and network type, its status, frequency, channel, MAC-address, and so on. Also WiFi Commander can detect devices that support Wi-Fi Direct.
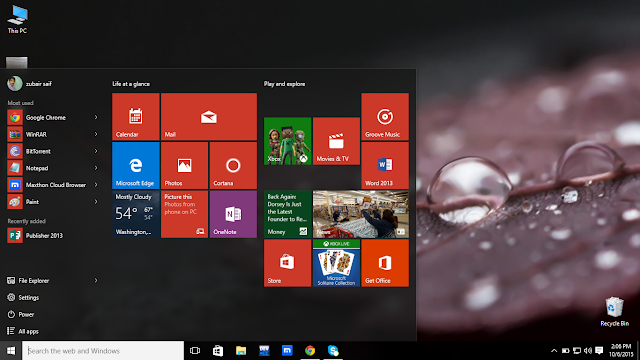
If you want to display some information, you can deactivate, it is also possible to filter the networks detected by various parameters, such as signal strength or availability. Naturally, the app allows you to quickly connect your device to the selected access point or switch between different networks. Of the additional features include monitoring of the signal level at the visual graph, support for multiple Wi-Fi-adapter, change the design of the working window.
Source :Developer website: wificommander.com
Place where all sort of programming stuff and reviews,technology news are shared and Useful Project of C++,C,java C# etc
Yesterday, Microsoft released a new build of Windows 10 Insider Preview, which contains a very sudden change in the mechanism of activation of the operating system. In particular, the numerous requests of insiders, the company has simplified the process of activation, allowing the use of the product license keys of previous versions of the operating system.
 Manually activate Windows 10 you can use the key on the Windows 7 or 8 8.1
Tech Spider: Manually activate Windows 10 you can use the key on the Windows 7 or 8 8.1
This means that from now on for the successful activation of "tens" users can use the key of Windows 7 or Windows 8 / 8.1.

Before running the release version of Windows 10, the company announced that the new operating system will be available as a free upgrade for all users of Windows 7 and 8 / 8.1 until 29 July 2016. But to take advantage of this offer can only be in the case of legal and activated copy of "Seven" or "eight".

When you upgrade the current operating system to Windows 10 product key, the previous version is automatically associated a Windows 10 computer is assigned a unique ID on the servers of Microsoft, and the system itself is activated when you first connect to the Internet. However, the automatic activation does not always work, and activate Windows 10 users should contact customer support Microsoft.

Fortunately, now can be used to activate the product key from the Windows 7 or 8, 8.1, and this also applies to the copy of Windows 10 installed from scratch, and not through the update.

It is important to note that this method of activation is now only supported in Windows 10 Preview build 10565 and is not available to users of public version of the operating system. They may have to wait for the first major update.
Place where all sort of programming stuff and reviews,technology news are shared and Useful Project of C++,C,java C# etc
From time to time, our computers begin to "laggy", falling productivity and application consumes too much memory or CPU resources, etc. Very often this involved viruses and other stuff that your computer is infected, but that if it is not? What to do if you use the best antivirus software with the most current anti-virus database, including other tools of computer protection, but still continue to deal with the slowness of a PC and stability of the operating system?
How To Restore And Reset Windows 8 To Factory Settings
Tech Spider :How to quickly restore and reinstall Windows 8
Operating systems tend to accumulate a lot of information, which can cause lethargy computer - is cached items, offline files, temporary data, registry keys that are no longer valid, and so on. This is especially true for machines running Windows. For this very reason, Microsoft decided to include in its various OS utilities to keep your computer optimized condition - Disk Defragmenter, Disk Cleanup, and more. So if you're actively using your computer, sooner or later you have to take advantage of such tools is not important, built-in or third-party.

In terms of performance and stability of Windows 8 has moved forward, even when compared with Windows 7, which also has something to boast on this score. However, Windows 8, it's all the same software and, therefore, it is subject to the same troubles that we faced when using earlier versions.Nevertheless, we must recognize that this operating system is perfect for portable devices (specifically for this, first of all, it and developed), so the Redmond giant decided to equip it with simple features, allows you to return your computer / tablet to its original / factory state. In Windows 8, there are two options with which you can easily return your computer (without affecting personal data) to its original state, or completely reinstall Windows 8, depending on what you need.

Both functions are in the menu "Change computer settings" and not in the normal control panel, as you might think. To access them, you need to open the Charms bar, or by moving the mouse cursor to the upper right or lower corners of the screen, or by using the keyboard shortcut Win + C. When the Charms bar, click "Options."

In the "Settings" button, click on the "Changing the computer."
Tech Spider :How to quickly restore and reinstall Windows 8
Tech Spider :Setting 
In the "PC Settings", go to the tab "General". There you will find two options, one is called "Restoring the PC without removing the file" and the other "Delete all data and reinstall Windows».

The "Restore PC without deleting files" will restore the system back to the default values. You do not lose your personal photos, videos, music and personalization options. 

Restore PC
Tech Spider :Restore PC
Also on site will remain and applications that you have downloaded from the store the Windows, but the programs that you installed from disks or the Internet, will be removed. To start the recovery process, first click on "Start" and then "Next" button and proceed in accordance with the instructions on the screen. It should be noted that the function will work if your computer has an active partition to restore Windows 8. Otherwise, you'll need the installation disc of Windows 8.

The second function, "Delete all data and reinstall Windows", more like a complete reinstallation of Windows 8, as will be completely removed all. The function is useful when you sell your computer or laptop, for example.


Restore
Tech Spider:Restore 
Prior to Windows 8, the process of "freshening" of the computer is a real hassle, so most users prefer to avoid it, simply because of the possible complications. With this version of Windows, Microsoft definitely made a step in the right direction.
Place where all sort of programming stuff and reviews,technology news are shared and Useful Project of C++,C,java C# etc
From Windows 10 Microsoft wants to please all users. In particular, the company has created a convertible "Start" menu, which is convenient to use on touchscreen devices, and on ordinary desktop PC. However, the test version of Windows 10 with this menu there are some problems, not all, but they are. For example, the menu is not always opens when you press the "Start" button, or opens, but does not display all the contents. Re "Start" menu can help in solving this problem.


Windows 10 Start Menu is Not Working
Tech Spider:How to re-register the "Start" menu in Windows 10

In December, I described the process of re-registration applications from the Windows Store to address a number of problems that may occur during their operation. In Windows 10 through Windows PowerShell, something similar can be done with the "Start" menu, but note that the use of this trick requires you that you are logged in as the administrator, so if your system is part of a domain, it can fail. Here is a simple guide:

1. Right-click on the taskbar and select "Task Manager" from the context menu.

Tech Spider: Task Manager


2. Next, in the "Task Manager", select the "File -> Run new task."
Tech Spider: File

3. Enter powershell, and do not forget to include the option "Create a task administrator." Click "OK"
Tech Spider: Create Task

4. Copy and paste the following command at the Windows PowerShell, and then press Enter:

Tech Spider:Powershell
Get-appxpackage -all * shellexperience * -packagetype bundle |% {add-appxpackage -register -disabledevelopmentmode ($ _. Installlocation + "\ appxmetadata \ appxbundlemanifest.xml")}
When the command is completed successfully, close the PowerShell, and then restart the computer. The problems that have arisen at you with a "Start" menu, will have to be resolved after the system reboots.
Place where all sort of programming stuff and reviews,technology news are shared and Useful Project of C++,C,java C# etc
It happens several times that a virus/ malware causes your Start Menu to malfunction. It won’t load despite several attempts. If you’re running into this problem, follow the steps in this tutorial.
tech spider: Windows 10 Start Menu is Not Working

Terminate & Reload Explorer.exe Process

Explorer.exe, also known as File Explorer, is a critical system process. When the process stops functioning as expected, Windows 10 Start Menu wouldn’t open. Terminate the process using Details tab after expanding Task Manager user interface. Don’t worry; suddenly all open windows and Taskbar will disappear. Launch the Run dialog box using its key combinations Windows Key + R; and then type the process name (here, in this case, its explorer.exe) and click OK.

Scan your PC

Running a complete drive scan helps you detect virus/ malware that has caused frequent Start Menu issues. Use Windows Defender, an in-built tool in Windows 10, or download a reliable Antivirus program from the Internet. Use below command in Run dialog:

MpCmdRun.exe [command] -Scan

Fix Windows 10 Registry

Unintended changes or corruption in Windows 10 Registry may have caused this error. Scan your laptop/PC with RegInOut to repair Windows 10 start menu.

Set Default Start Settings


Your Start Menu settings might be changed. Set all default settings for your Start Menu. This settings have to be changed using Settings page in Start Menu. Since you don’t have access to Start Menu, there are alternative methods. Fire up Task Manager by pressing Ctrl + Alt + Delete key combinations, expand its user interface, and then choose to run new task from File menu. Type in “ms-settings:” (without quotes), and then set all the following default settings under Start tab under Personalization section in Settings page.


Enable: 
  • Show most used apps 
  • Show recently added apps 
  • Show recently opened items in Jump Lists on Start or the Taskbar 
Disable:
  • Use Start full screen 
  • Perform System Restore
Start Menu won’t function properly due to some recent changes in your Windows Registry. Restore system settings using a specific restore point. Run below file path using Run dialog:
rstrui.exe

Delete & Recreate User Profile

Your user profile may be corrupted. Delete your local user profile and re-create another profile with system default settings. When prompted, do not integrate your Windows Live account in order to prevent importing the same old profile settings. Type “Control Panel” in Run dialog and then go to “Remove user accounts” under User Accounts category.

Fix Windows Image

Using Command Prompt repair the Windows image using below command. Open Command Prompt from Run dialog using “CMD” command.

Dism /Online /Cleanup-Image /RestoreHealth
Place where all sort of programming stuff and reviews,technology news are shared and Useful Project of C++,C,java C# etc
How To Schedule A Shutdown For Windows OS?
This article describes the stairs to time table a Shutdown command for windows OS. Take a glance.

The first actual mission we learnt become to turn ON and Shutdown home windows when we had been children, and once in a while we felt the need to close down windows after a designated time in case of an emergency or due to some different purpose, however couldn’t find a manner to do so.
In this newsletter we’ve described a step-through-step procedure to time table a shutdown command for home windows OS. This approach has been examined on home windows 10 & windows 7, with a bit of luck it’ll work on different variations too.


It is recommended to read all the steps carefully before implementing them.

Here are steps:

  • Go to your Desktop.
  • Right click -> New -> Shortcut. A new window will open, asking the location for the shortcut.
  • Tech Spider : ShutDown
    Tech Spider:shortcut.
  • Now, you need to recall your primary math concepts.
  • We have,

1 minute = 60 seconds
                                   1 hour = 60 minutes*60 = 3600 seconds

  • After you’ve successfully recalled the conversion of minutes to seconds. Type, shutdown –s –t 60 in the text field below ‘Type the location of this item’.
Tech Spider : ShutDown
Tech Spider : ShutDown 
  • The number 60 written in the above command stands for seconds, so type the number of seconds after which you want to schedule a shutdown. For example, we tested it to shut down after 1 minute (60), and it worked successfully.
  • Click Next, when you’re done typing the command.
  • In the next step, name the file Shutdown.exe. You can name it whatever you like, but don’t forget to add ‘.exe’ at the end of the file name.
    Tech Spider : ShutDown
    Tech Spider : ShutDown 
  • Click Finish and you’re done.
  • Now, just double-click the Shutdown.exe file created on your desktop whenever you need to schedule a shutdown after a minute gap.
This is a one-time process and you don’t need to repeat it once more. Just double-click on ‘Shutdown.Exe’ and depart the rest to your home windows pc.
Additionally examine: Use the brand new home windows 10 Keyboard Shortcuts in Command set off
in case you feel the want to trade the time restrict, simply delete the existing ‘Shutdown.Exe’ and create a brand new one with a specific time restrict, following the above steps. You could hold the prevailing record also, just select any other call for the following record you create.
And it's miles completely your responsibility if whatever goes incorrect along with your laptop. No offence please.